Documentation
Overview
Whether you're planning to set up an online store or would like to use Jpanel as your E-Commerce platform for customers, you can find out more information about your options here.
To start the process of designing an E-Commerce website, follow the Initial Setup Guide. The setup guide provides step-by-step instructions on how to complete the main activities required before you begin selling.
Initial Set Up Guide
The following section lists the most important steps to accomplish in order to get your E-Commerce website up and running as quickly as possible. Let's get started on your expedition.
Start with a domain
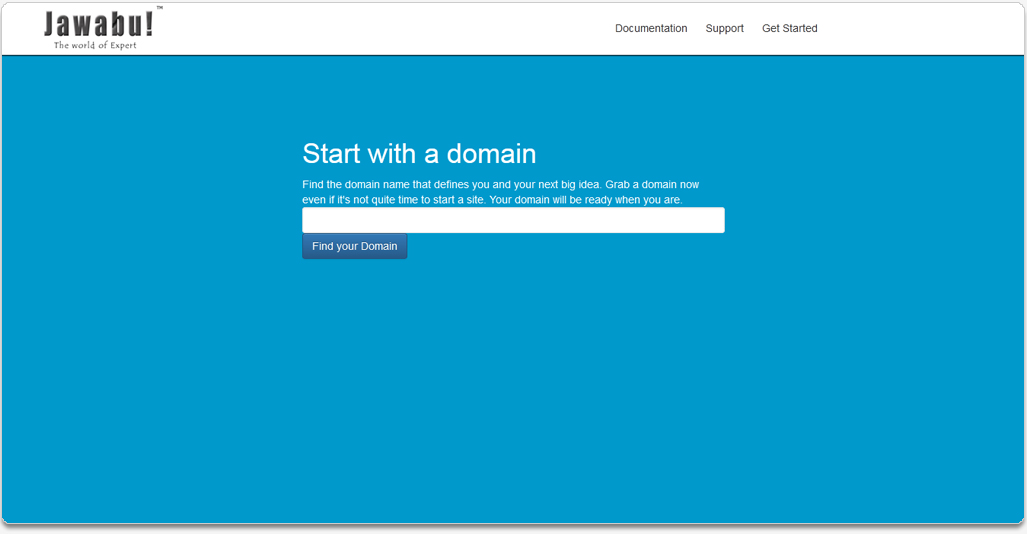
If your domain is hosted by Jawabu, you can add it to a new or existing Jpanel site in your Domains panel. If you don't have a custom domain, you can register a new one through Jpanel.
Choosing Your Plan
Configuring Email Gateway or Sender Email
Email Gateway: If you're connecting your platform with an email service, enter the required SMTP server settings and credentials. This allows you to send and receive emails seamlessly through the platform.
Sender Email: Choose the sender email address that recipients will see when you send messages. This is an important step to personalize your communication.
Payment Setup
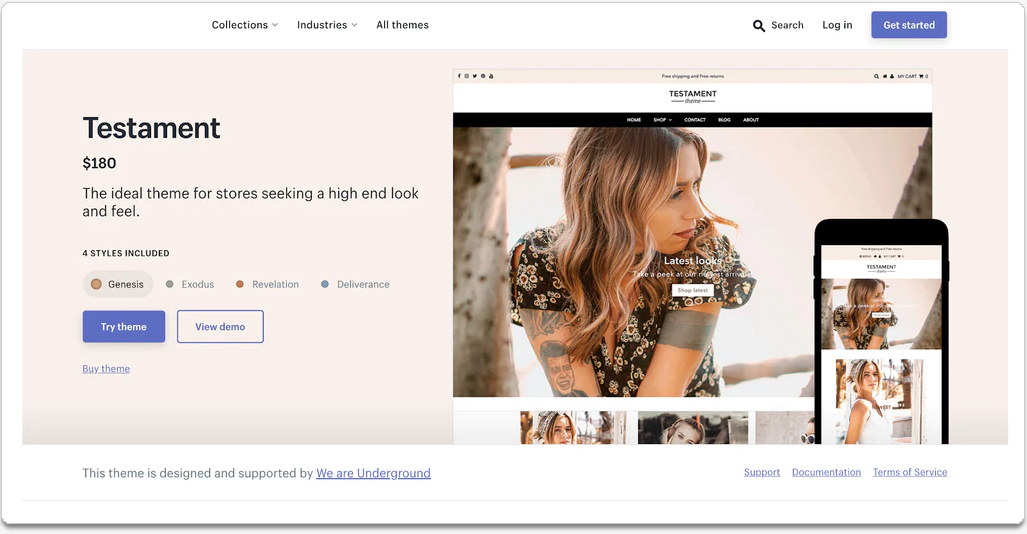
How to edit your website theme
After choosing a theme that defines your online store's basic look and feel, you can customize the theme to suit your unique brand. Under the Shop Theme Section, you can open the editor to customize your theme content
How to log in to Admin Panel
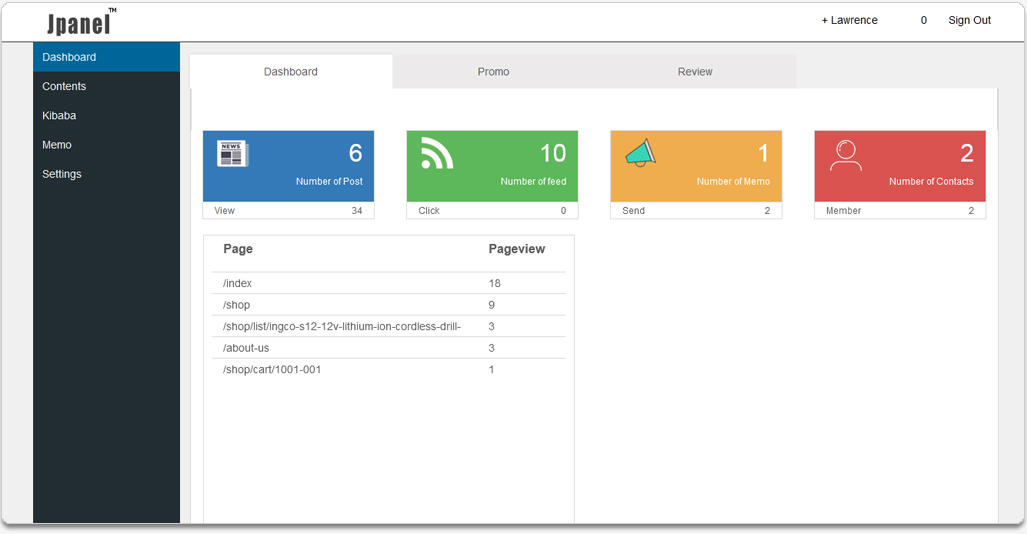
Overview of the Admin dashboard
Publishing

Write Web Page
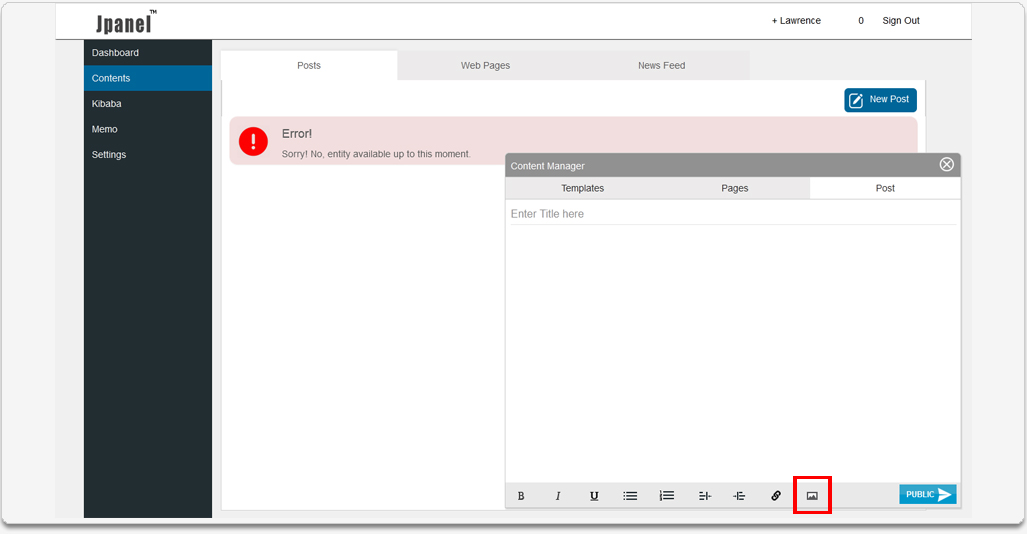
Step 1: In the website's dashboard click the "Contents".
Step 2: Click the "Add Post" to open "Content Manager".
Step 3: In the "Content Manager" click Templates to select "Standard".
Step 4: Click the "Pages" to enter your page “permanent link.”
Step 5: Click the "Post" enter your page title in the upper field "Enter Title Here" and enter your page. body content in the main post editing box below it.
Step 6: When you are ready, click Publish.
Noted: News and Events is the default “permanent link.” for the Blog page
Write Blog Page
Step 1: In the website's dashboard click the "Contents".
Step 2: Click the "Add Post" to open "Content Manager".
Step 3: In the "Content Manager" click Templates to select "Article, Blog, Hyperlink, Quote, or Poll".
Step 4: Click the "Pages" to enter your blog “permanent link.”
Step 5: Click the "Post" enter your page title in the upper field "Enter Title Here" and enter your page body content in the main post editing box below it.
Step 6: When you are ready, click Publish.
Write Blog Page
Step 3: In the "Content Manager" click Templates to select "Article, Blog, Hyperlink, Quote, or Poll".
Step 4: Click the "Pages" to enter your blog “permanent link.”
Step 5: Click the "Post" enter your page title in the upper field "Enter Title Here" and enter your page body content in the main post editing box below it.
Step 6: When you are ready, click Publish.
Edit Web Page
To start Edit a Web page, follow these steps:
Step 1: In the website's dashboard click the "Contents".
Step 2: Click the "Web Pages".
Step 3: Find the page you would like to edit and click on ‘Edit’.
Step 4: Make the changes you desire.
Step 5: When you are ready, click Publish.
Edit Blog Page
To start Edit a Blog page, follow these steps:
Step 1: In the website's dashboard click the "Contents".
Step 2: Find the Post you would like to edit and click on ‘Edit’.
Step 3: Make the changes you desire.
Step 4: When you are ready, click Publish.
Setting Page and Post Visibility
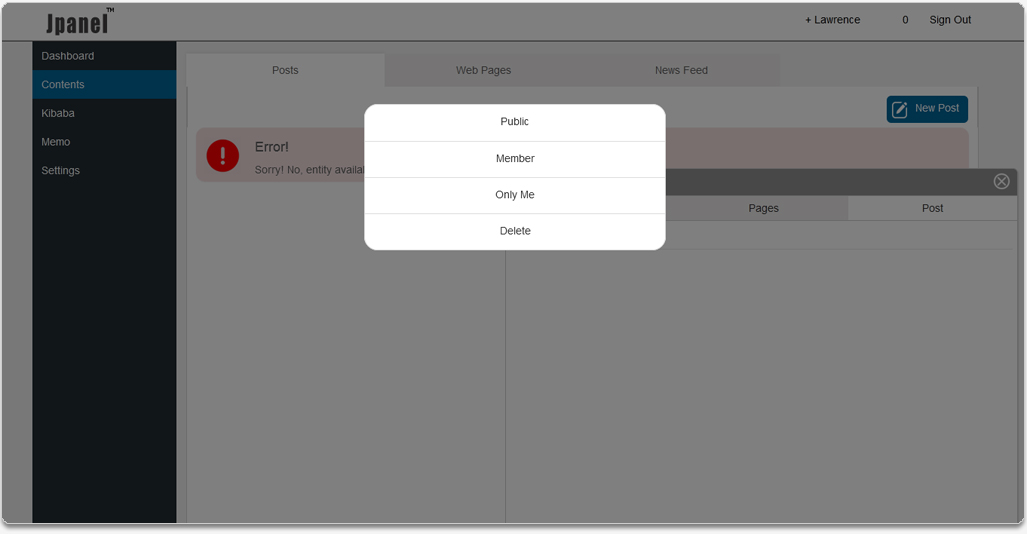
The options are:
Public: The default, viewable to all. Public visibility means that the content will be visible to the outside world as soon as it is published.
Member: Only certain members or groups can see that Blog post or page.
Only Me: Only you can see that Blog post or page.
Delete: This means that the Blog posts or page will still be accessible from the admin panel, but will not be shown on the live website.
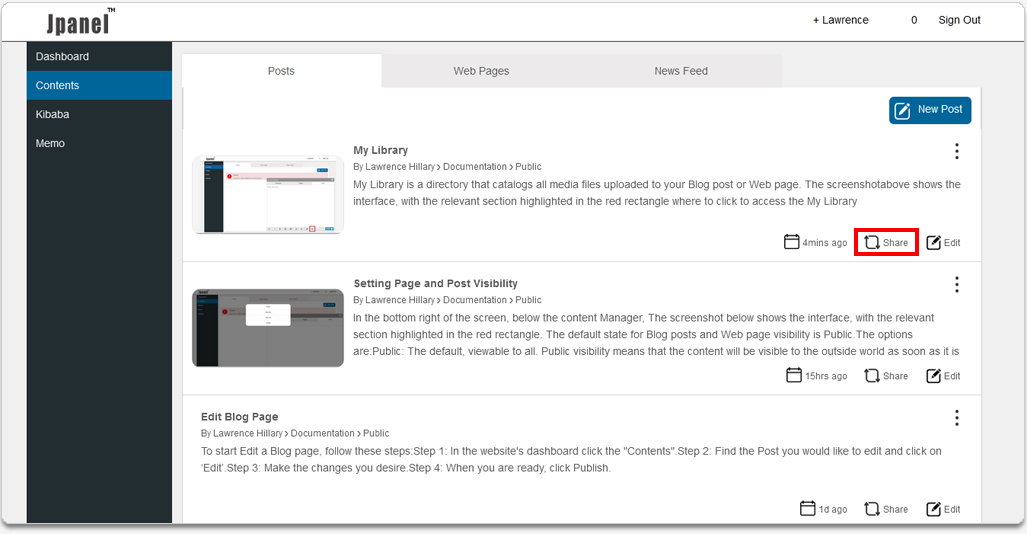
My Library
above shows the interface, with the relevant section highlighted in the red rectangle where to click to access
the My Library
Share Your Content
Sharing Blog posts or Web Pages to social media can be a core component of your social media marketing strategy. It can not only help drive targeted traffic to your site, it can also help your site’s Search Engine Optimization (SEO).
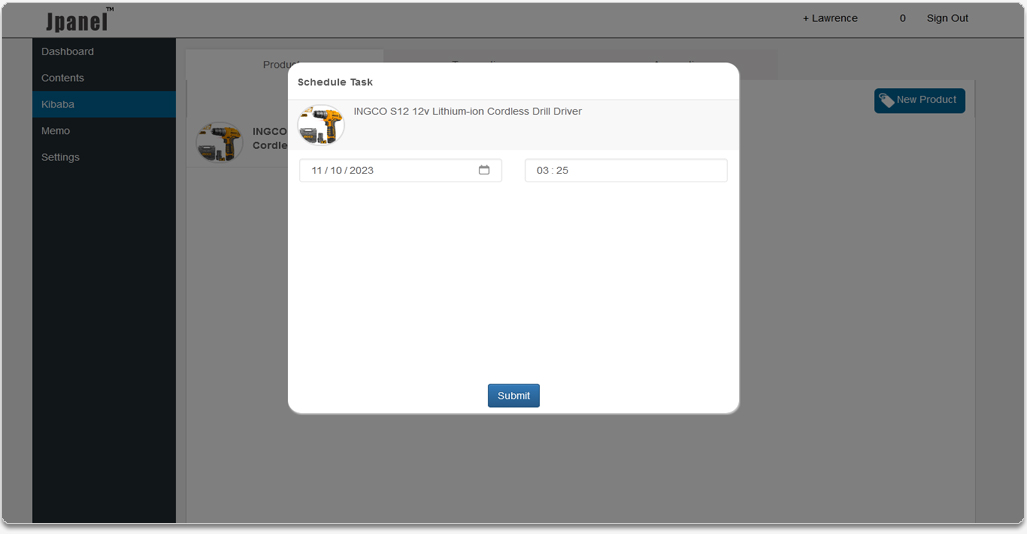
Scheduling Your Content
The scheduling tool helps to regulate content output. Instead of having articles go live right away, schedule them on a specific date instead. In addition, scheduling articles to publish automatically at busy hours helps to increase traffic.
Reorder Your Content
Summarise Your Content
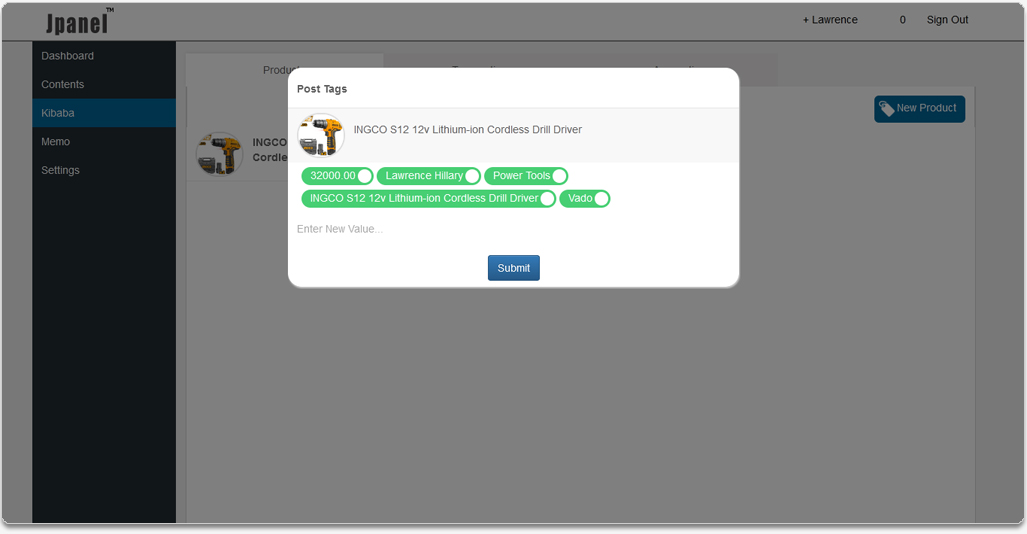
Add Tags
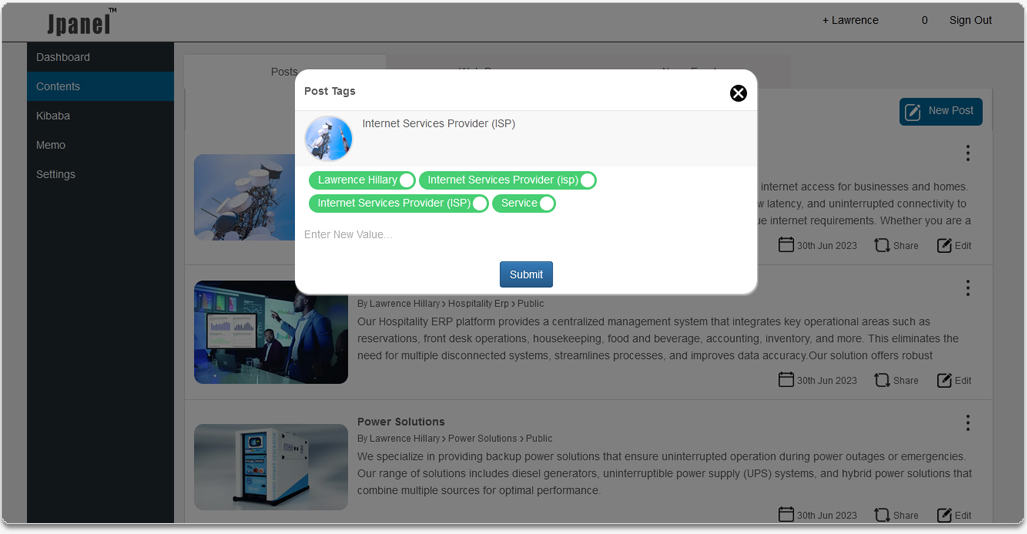
Jpanel tags offer an easy way to optimize your content. Users can quickly find what they’re looking for, and search engines can recognize your content as relevant.
New Product

Step 1: In the website's dashboard click the "Kibaba".
Step 2: Click the "New Product"
Step 3: In the "New Product" click Product to enter your Product title in the upper field "Enter Product Name Here" and enter your product description. body content in the main post editing box below it.
Step 4: Click the "Category" to enter "Product Category" Product categories are labels that are assigned to products or to collections of products.
Step 5: Click the "Variants" to enter the "combination of option values for a product name". You add variants to a product that comes in more than one option, such as size or color.
Step 6: Under "Variants", add Basic Information like Variant Picture, Product Price, Quantity, Stock availability, and Variant Visibility.
Step 7: When you are ready, click Publish.
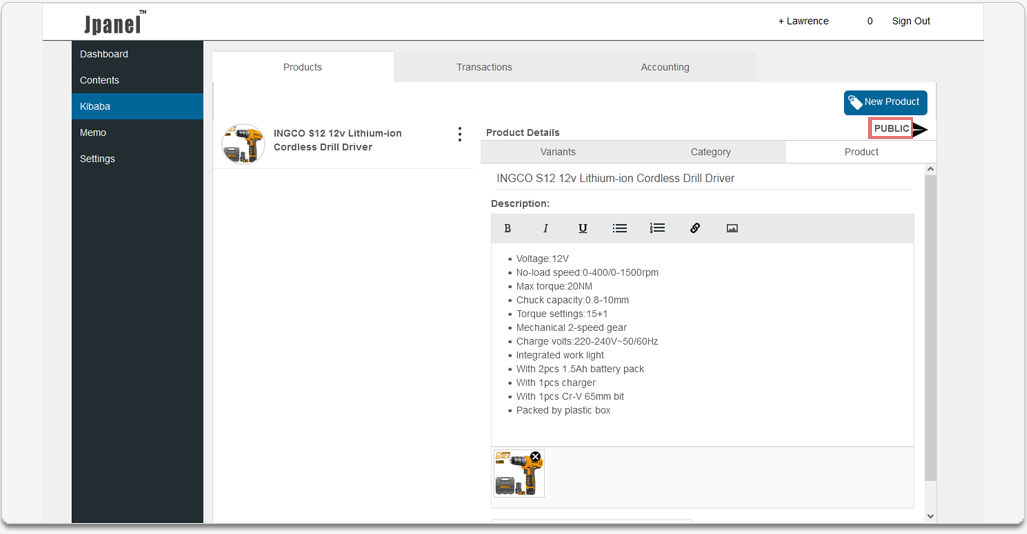
Edit Product
Step 1: In the Website's dashboard click the "Kibaba".
Step 2: Find the product you would like to edit click to open "Product details".
Step 3: Make the changes you desire.
Step 4: When you are ready, click Publish.
Product Visibility
Add Related Products
Schedule publishing
Add product Tags
How to manage your orders(Transactions).
Selling and getting paid in different currencies
Store currency - the currency of your reports. For example, this is the currency that you use when you set prices for your products
Payout currency - the currency that Shopify Payments uses when it deposits money into your bank account.